Uploading Images (GitHub)
Thanks for wanting to submit an image to the site! Here we’ll go over how to do that. First its good to note that images on the site are split into two files: the image itself, and a .html file that uses parameters to describe & tag it.
Steps
-
STEP ONE!!! This is very important, please first convert the image to the .avif format. The original site had no size restrictions and its images folder was 8gb in size. Now everything is processed in the new web format .avif and is down to 700mb. This is a highly compressed format that doesn’t leave bad compression artifacts like .jpeg does. Every single image editor supports exporting to it, but if you don’t have time here’s a webpage that does it for you. THANKS IN ADVANCE!
-
Now, be sure the file has a unique filename, otherwise you’re gonna overwrite something. Smash your keyboard for a good name. BE AWARE some symbols don’t work well with the site to please just use letters and numbers!
-
Next go into the editor, you can just click “Edit Page” up top. (Or open Visual Studio Code if you’re doing this locally) Inserting images is not dependent on any specific article.
-
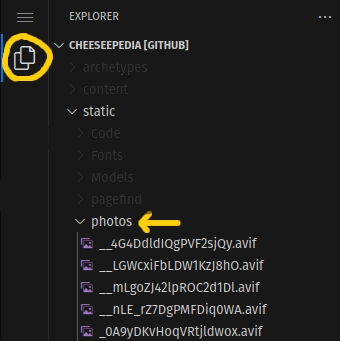
Go to the file view on the left and search for the folder
static/photos. Be EXTRA sure you’re in thestaticparent folder and notcontent. The files in here should end in .avif. Drag and drop your image into this photos folder. {style=“width: 30%;”}
 -
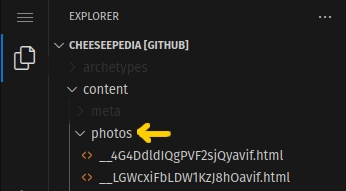
Now, go to
content/photos. Be EXTRA sure you’re now in thecontentparent folder and notstatic. The files in here should end in .html. Right click on the photos folder and hit “New File”. Name this your photo name .html. Sowhat.avif, will be alsowhat.html. This isn’t case sensitive but its nice to keep it consistent. {style=“width: 30%;”}
 -
Inside that new file, paste this:
+++ title = "" tags = ["Photos"] startDate = "" draft = false pages = [] citations = [] +++ -
These are your parameters to describe your photo. Every article the photo will appear in will use these so nothing is duplicated! BE SURE that the “title” parameter is your full filename, with extension! so it would be
title = "what.avif". After you fill in these parameters your photo will appear on the appropriate pages!
Parameters
If you’re unfamiliar with parameters, go back to the }}">Editing Parameters{meta="" editing="" parameters"=""} tutorial.
title = ""The full filename with extension. Example:"what.avif"startDate = ""The date the photo was taken. Formatted likestartDate = "2024-12-31".draft = falseThis parameter must always be there and always be false. Turning it true hides it from showing on the site.tags = ["Photos"]This parameter must always just be [“Photos”], don’t change it.pages = []These are the titles of every page the photo will appear on in the “Gallery” section. Note that it is the titles and not the filenames! It is very important to tag every single thing in the image!- Artwork of characters goes under pages like “Billy Bob (Character)”, while walkarounds and animatronics go specifically to the “Billy Bob (Animatronic)” and “Billy Bob (Walkaround)” pages.
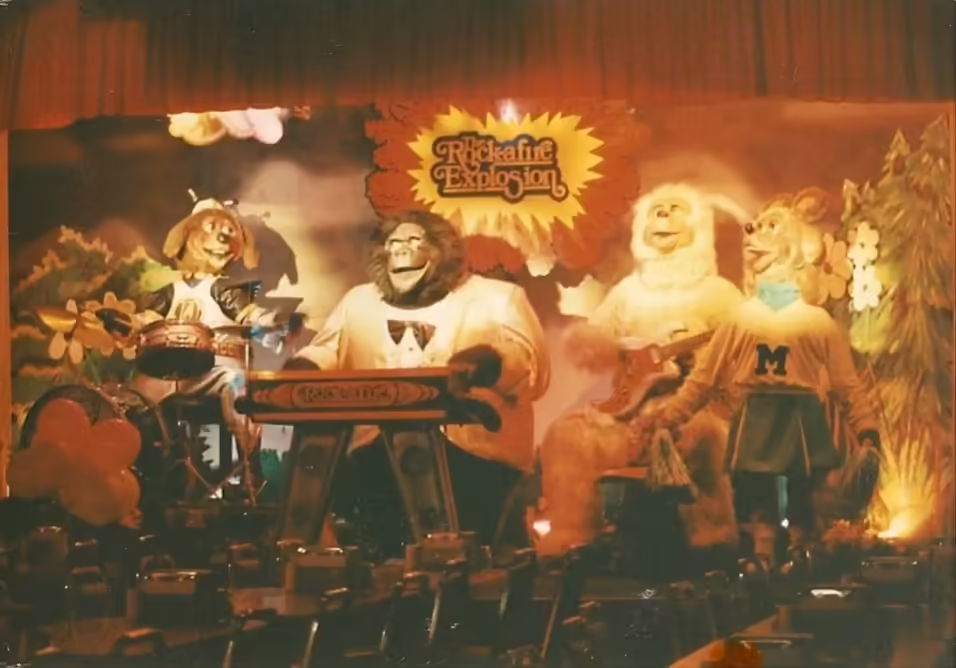
- Let’s use an example for this image here:
pages = ["Cincinnati, OH (8801 Colerain Ave)","Beach Bear (Animatronic)","Dook Larue (Animatronic)","Fatz Geronimo (Animatronic)","Mitzi Mozzarella (Animatronic)","Classic Stage","Rock-afire Explosion","ShowBiz Pizza Place","Creative Engineering"] {style=“width: 30%; margin: 0.5em”}
So we’re tagging the store, each animatronic, the stage type, the show type, and the companies involved. If you’re wondering that means the company pages are going to be filled with 5000 images- galleries will actually be disabled for those as images are irrelevant to those topics, but tagging them is still important for quickly searching for photos!
- `` Give a general description of the image and the context, this is an important accessibility option!
citations = []If your photo comes from a linkable source, note it here.