
CEC Pizza Training Document
The CEC Pizza Training Document was a document consisting of 3 laminated pages used for training on pizza making, released at an unknown point around the 2000’s. The document goes over each step in making a standard pizza, not specific to any variant with toppings. It would be hung on the wall of the kitchen during its use.[1]
Transcription
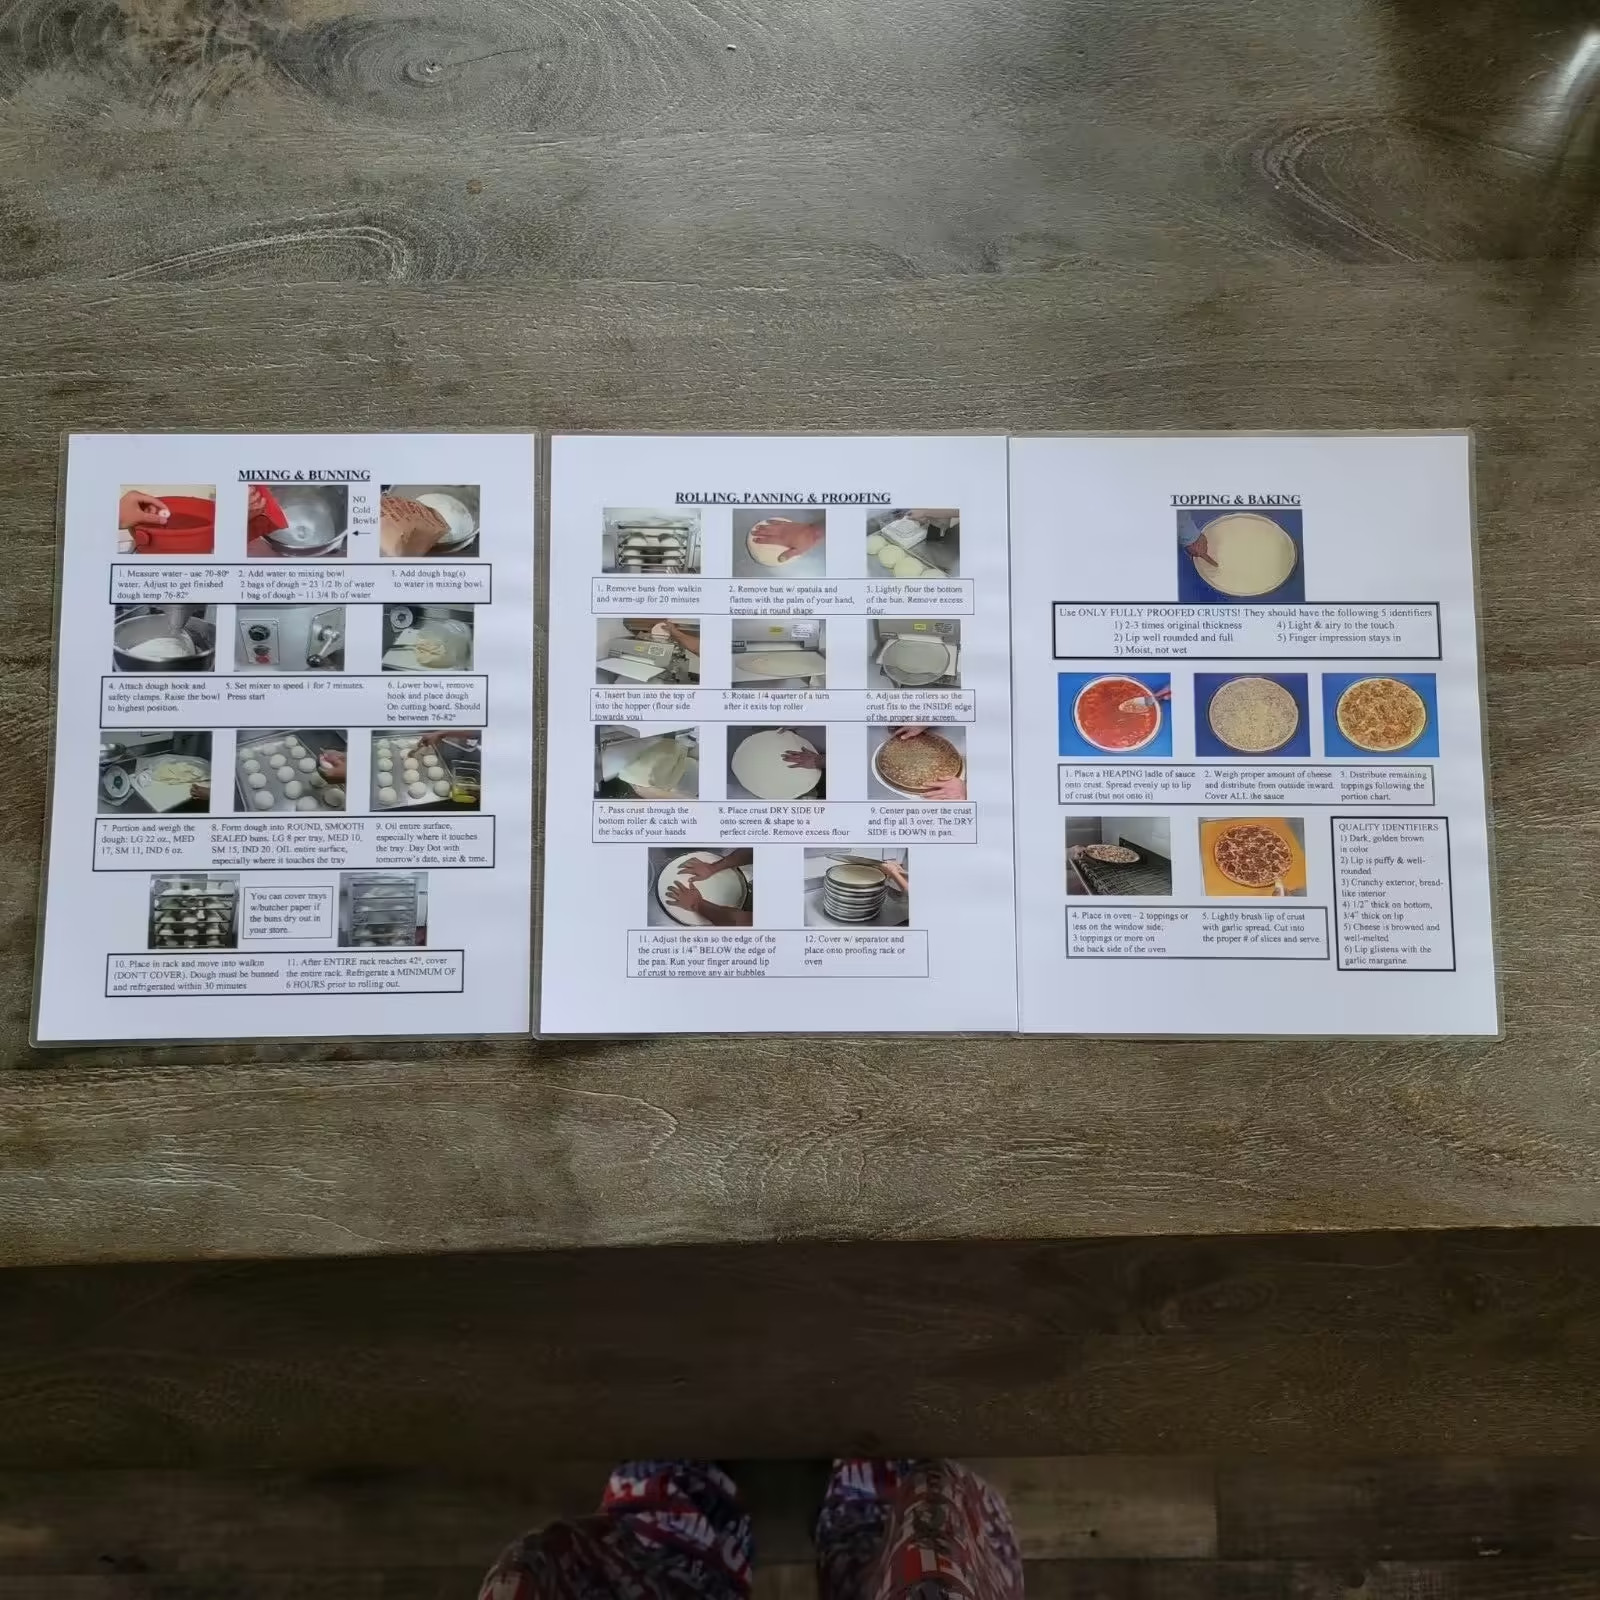
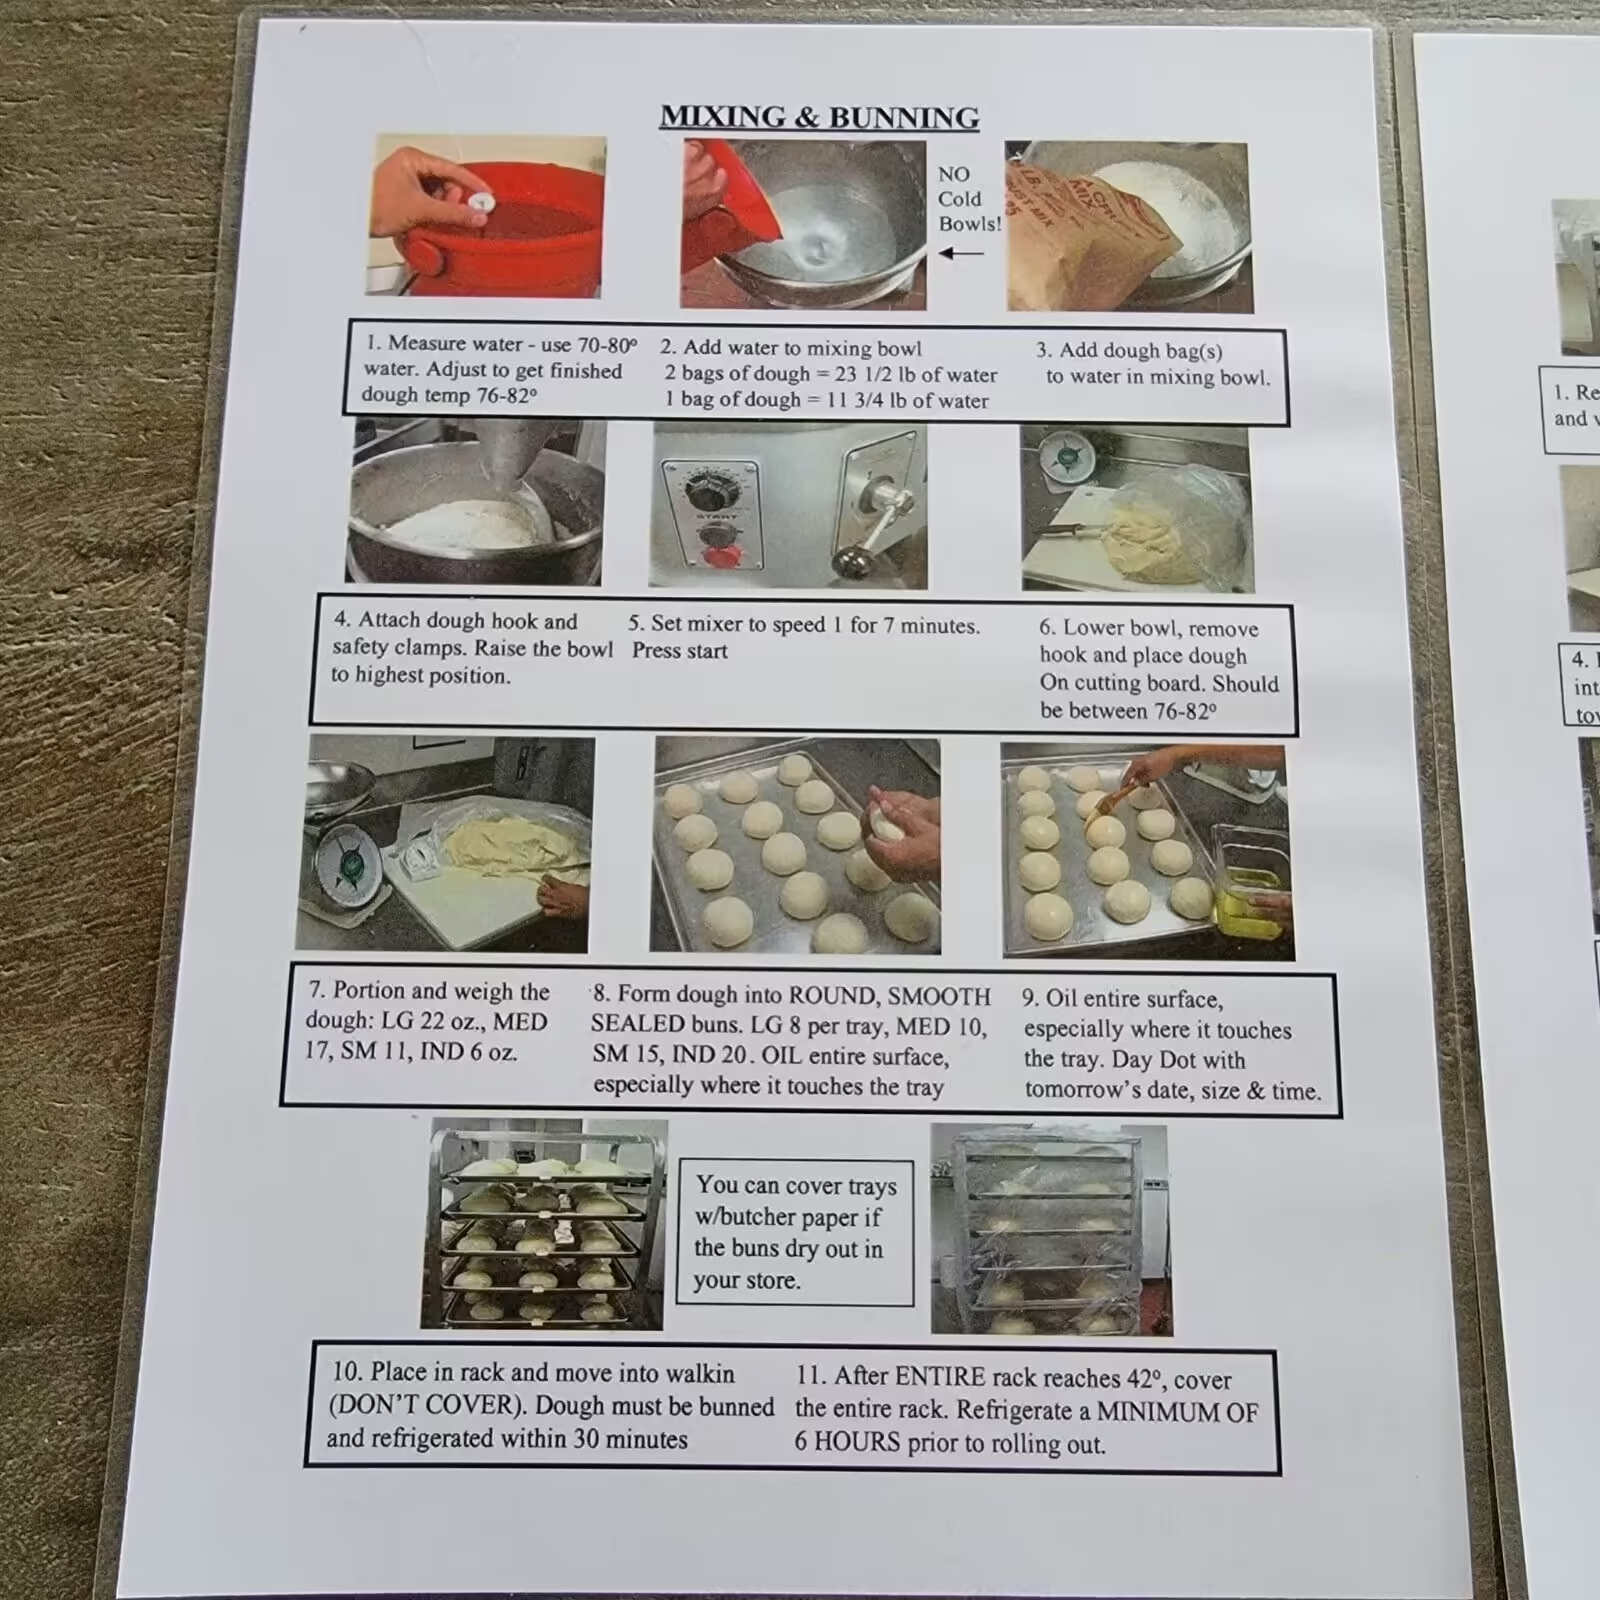
Mixing & Bunning
- Measure water - use 70-80° water. Adjust to get finished dough temp 76-82°
- Add water to mixing bowl. Cold Bowls!
- 2 bags of dough = 23 1/2 lb. of water
- 1 bag of dough = 11 3/4 lb. of water
- Add dough bag(s) to water in mixing bowl.
- Attach dough hook and safety clamps. Raise the bowl to highest position.
- Set mixer to speed 1 for 7 minutes. Press starts
- Lower bowl, remove hook and place dough on cutting board. Should be between 76-82°
- Portion and weight the dough: LG 22 oz., MED 17, SM 11, IND 6 oz.
- Form dough into ROUND, SMOOTH, SEALED buns. LG 8 per tray, MED 10, SM 15, IND 20. OIL entire surface, especially where it touches the tray
- Oil entire surface, especially where it touches the tray. Day Dot with tomorrow’s date, size & time.
- Place in rack and move into walkin (DON’T COVER). Dough must be bunned and refrigerated within 30 minutes. can cover trays w/ butcher paper if the buns dry out in your store
- After ENTIRE rack reaches 42°, cover the entire rack. Refrigerate a MINIMUM OF 6 HOURS prior to rolling out.
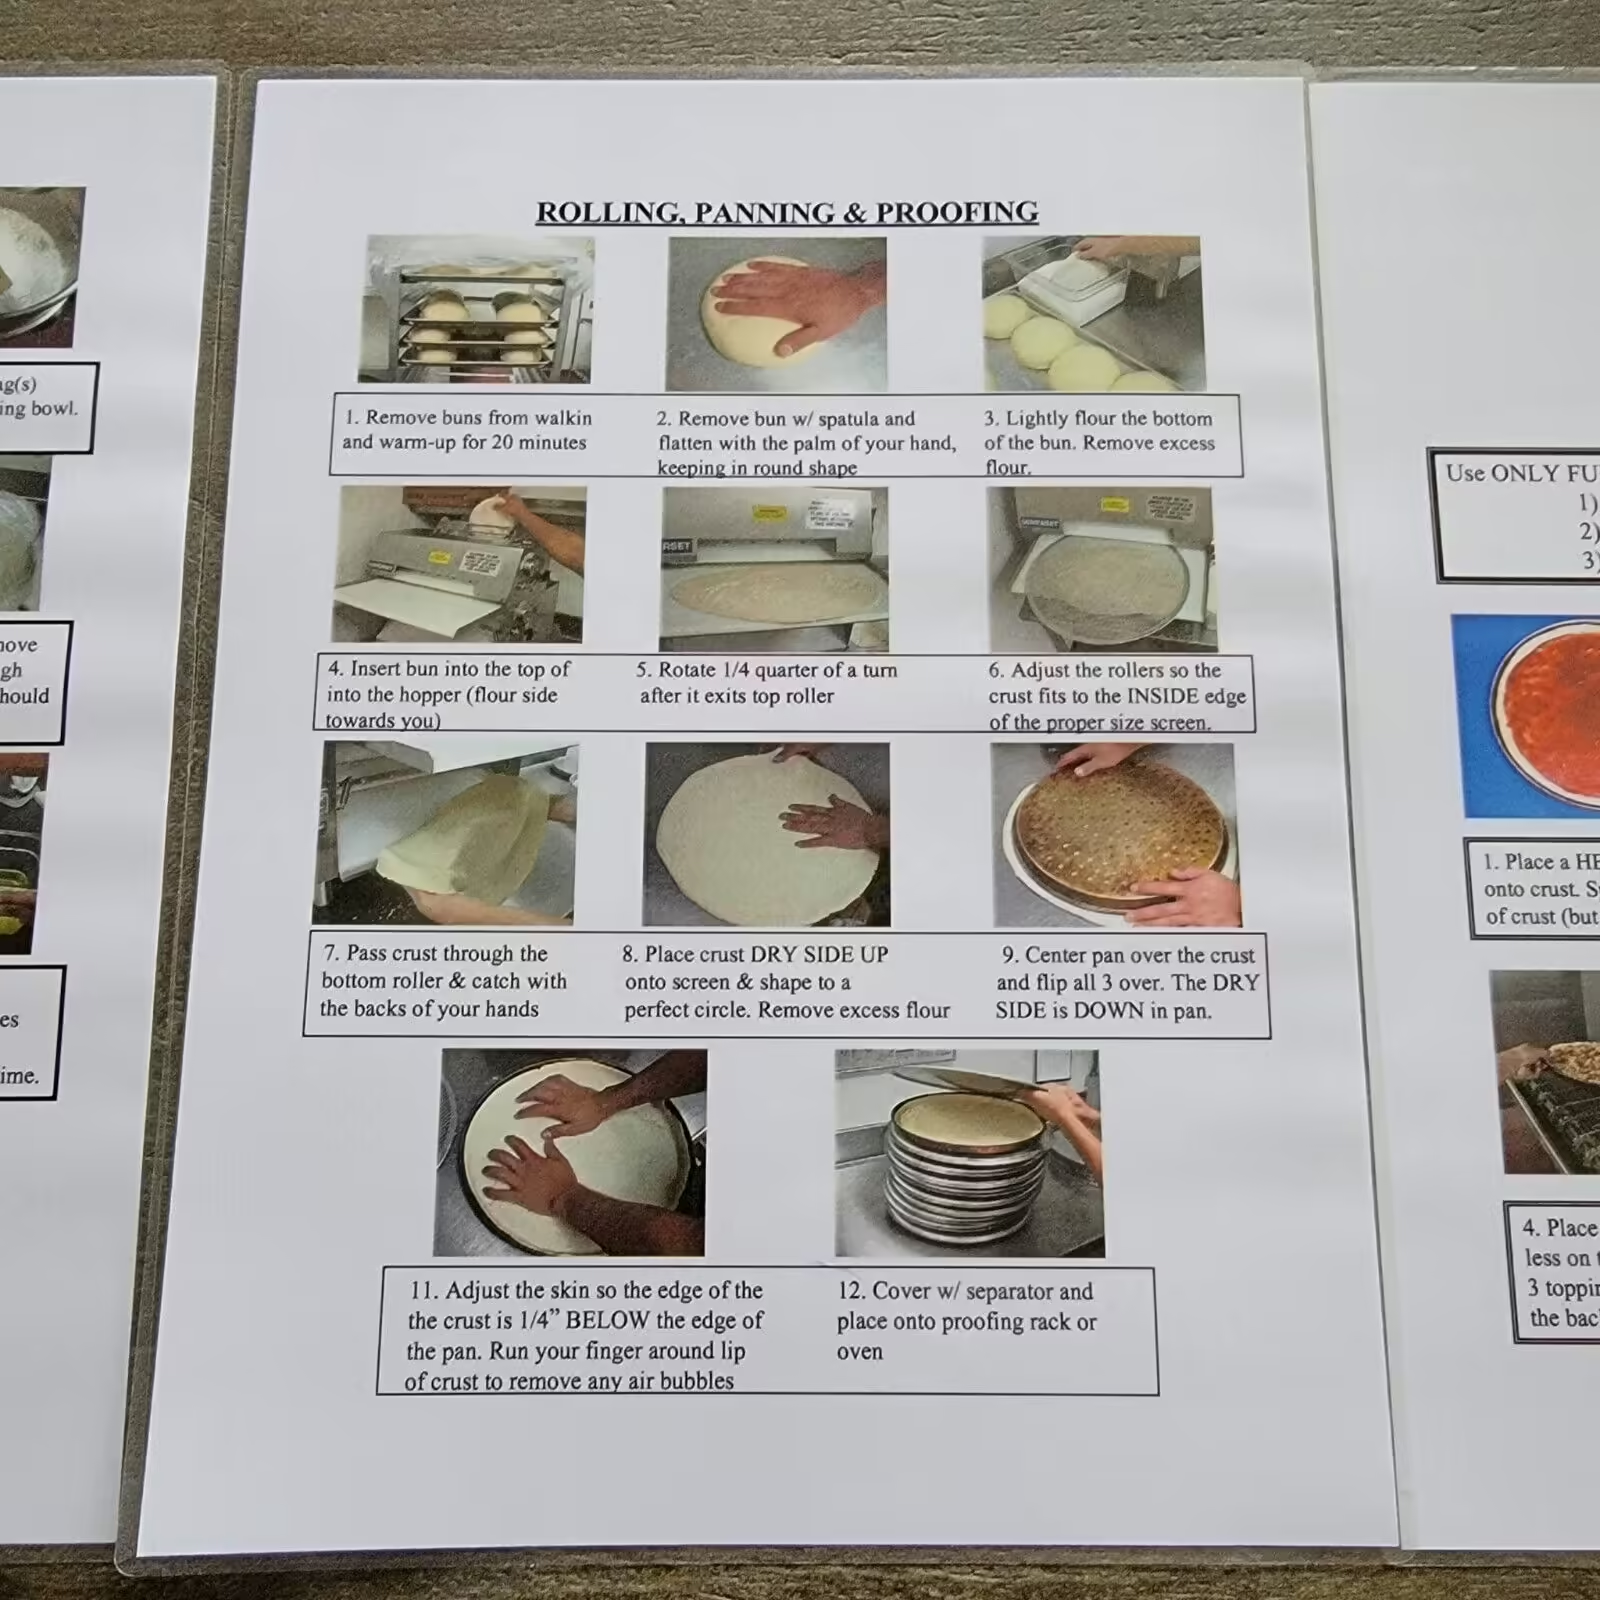
Rolling, Panning, & Proofing
- Remove buns from walkin and warm-up for 20 minutes.
- Remove bun w/ spatula and flatten with palm of your hand, keeping in round shape
- Lightly flour the bottom of the bun. Remove excess flour.
- Insert but into the top of into the hopper (flour side towards you)
- Rotate 1/4 quarter of a turn after it exits top roller
- Adjust the rollers so the crust first to the INSIDE edge of the proper size screen.
- Pass crust through the bottom roller & catch with the backs of your hands
- Place crust DRY SIDE UP onto screen & shape to a perfect circle. Remove excess flour.
- Center pan over the crust and flip all 3 over. The DRY SIDE is DOWN in pan.
- Adjust the skin so the edge of the crust is 1/4’ BELOW the edge of the pan. Run your finger around lip of crust to remove any air bubbles
- Cover w/ separator and place onto proofing rack or oven
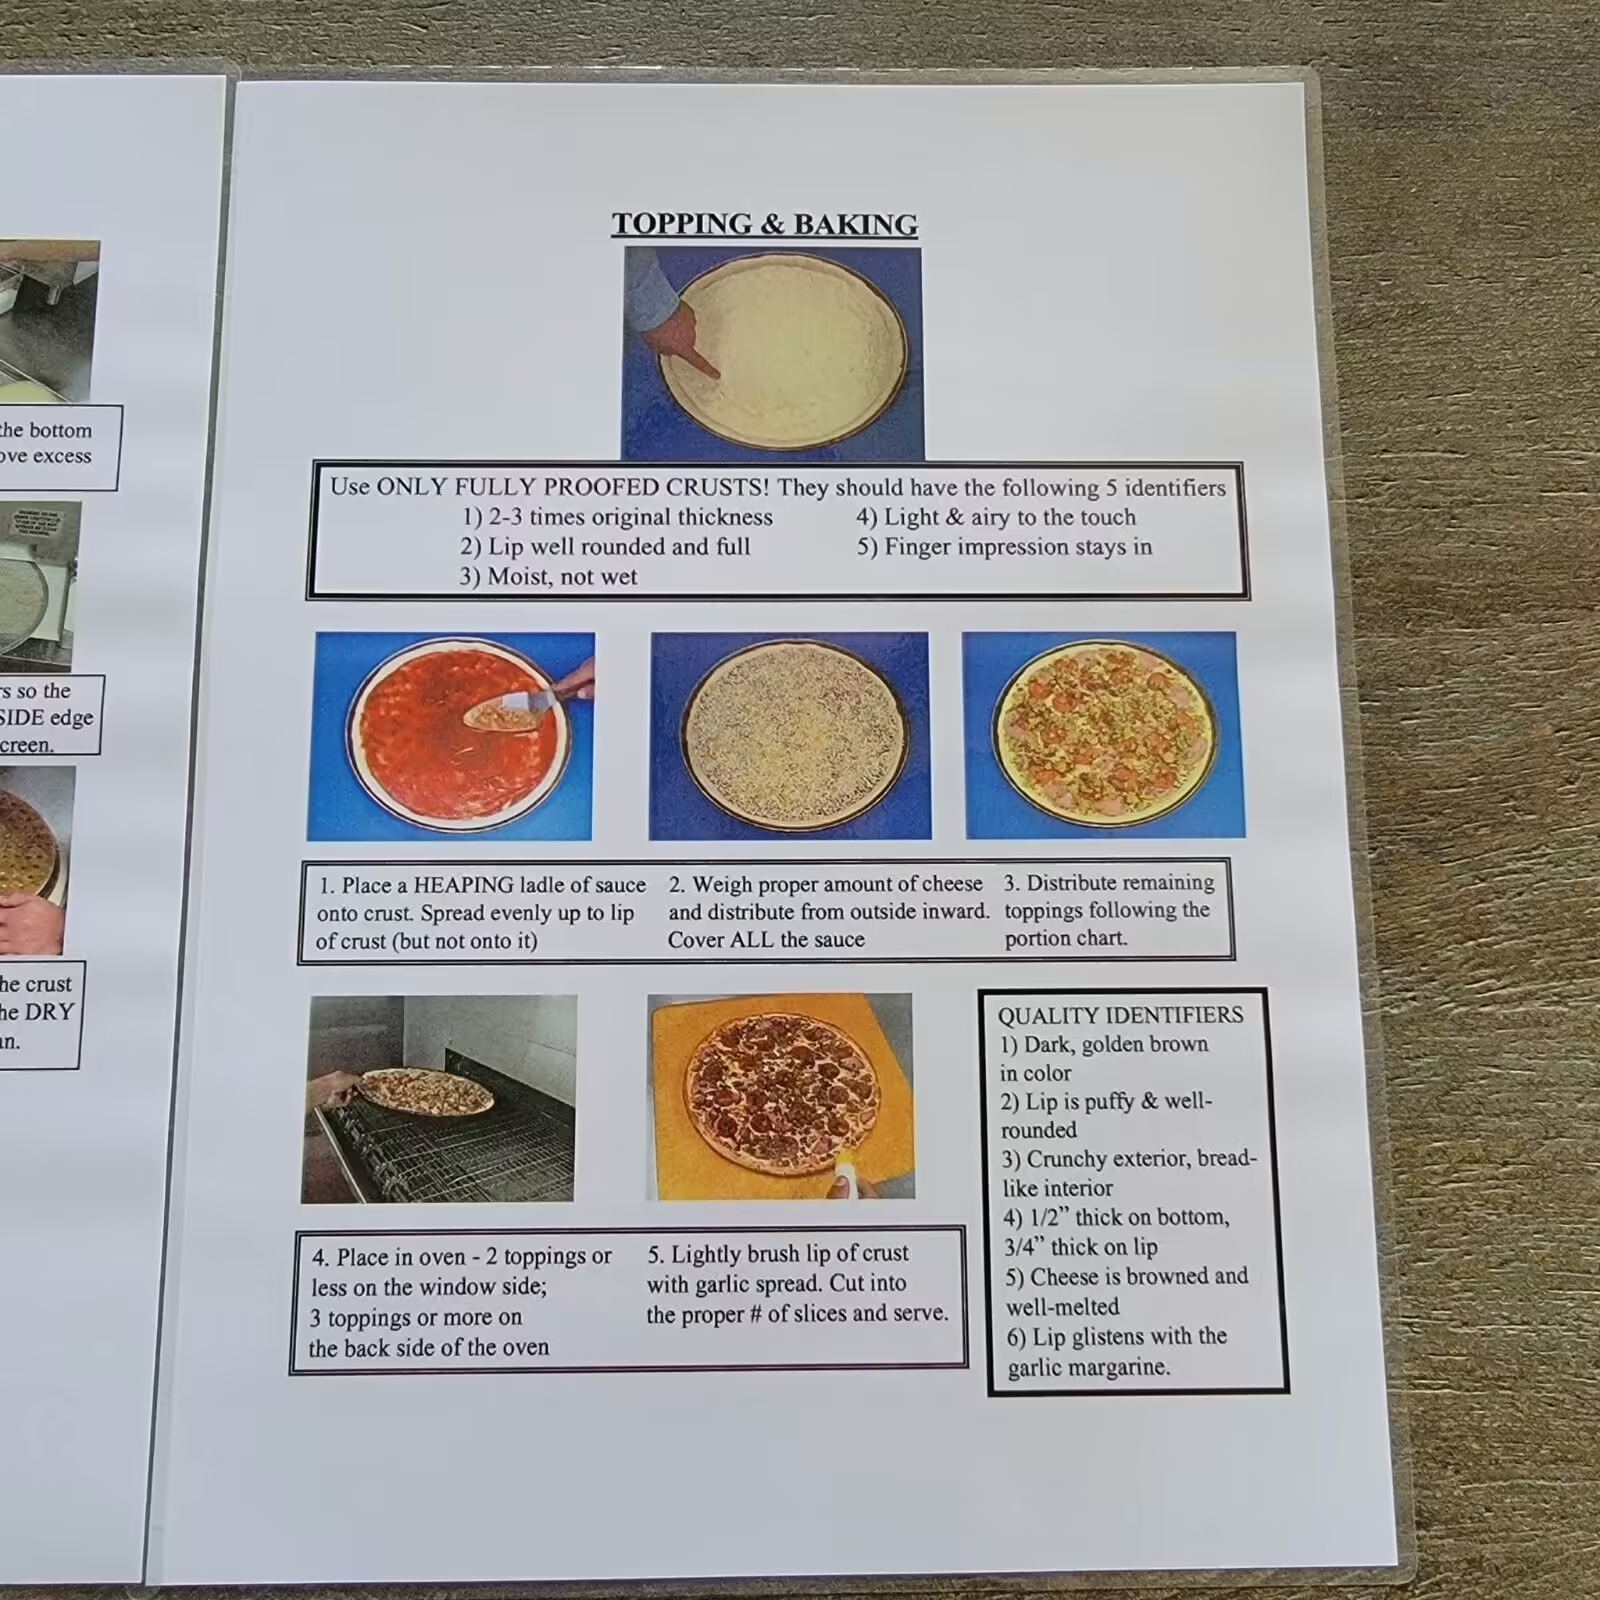
Topping & Baking
Use ONLY FULLY PROOFED CRUSTS! They should have the following 5 identifiers.
- 2-3 times original thickness
- Lip well rounded and full
- Moist, not wet
- Light & airy to the touch
- Finger impression stays in
- Place a HEAPING ladle of sauce onto crust. Spread evenly up to lip of crust (but not onto it)
- Weigh proper amount of cheese and distribute from outside inward. Cover ALL the sauce.
- Distribute remaining toppings following the portion chart.
- Place in over - 2 toppings or less on the window side; 3 toppings or more on the back side of the oven
- Lightly brush lip of crust with garlic spread. Cut into the proper # of slices and serve.
QUALITY IDENTIFIERS
- Dark, golden brown in color
- Lip is puffy & well-rounded.
- Crunchy exterior, bred-like interior.
- 1/2’ thick on bottom, 3/4 thick on lip
- Cheese is browned and well-melted.
- Lip glistens with the garlic margarine
References
Numbered in the order they appear. Reference in article text with .
Fields here update the page's metadata. All saves go through a pull request for review.
Location-specific fields: store info, coordinates, animatronics, remodels, stages, etc.
Showtape-specific fields.
Product-specific fields: pricing, sales records, manufacturer info.